
Insert the probe into the thickest part, avoid bone, and read the final temp.
If you want to know how to use food thermometer correctly, you’re in the right place. I test recipes for a living, and I’ve learned the small steps that keep food safe and juicy. This guide explains how to use food thermometer correctly with simple steps, pro tips, and common pitfalls to avoid. Stick with me, and you’ll never guess at doneness again.
Why temperature matters for safety and flavor
Heat kills harmful bacteria. Color and timing do not. A burger can look done and still be unsafe. A chicken breast can be dry on the edges yet undercooked inside.
Using a food thermometer protects your family and guests. It also helps you hit peak texture every time. When you know how to use food thermometer correctly, you stop guessing and start cooking with confidence.
You also save money. Fewer overcooked steaks. Fewer dried-out roasts. Just right, every time.
:max_bytes(150000):strip_icc()/__opt__aboutcom__coeus__resources__content_migration__serious_eats__seriouseats.com__images__2016__10__20161008-meat-temp-5-e10885b8363b44bf825df1d9ae43a702.jpg)
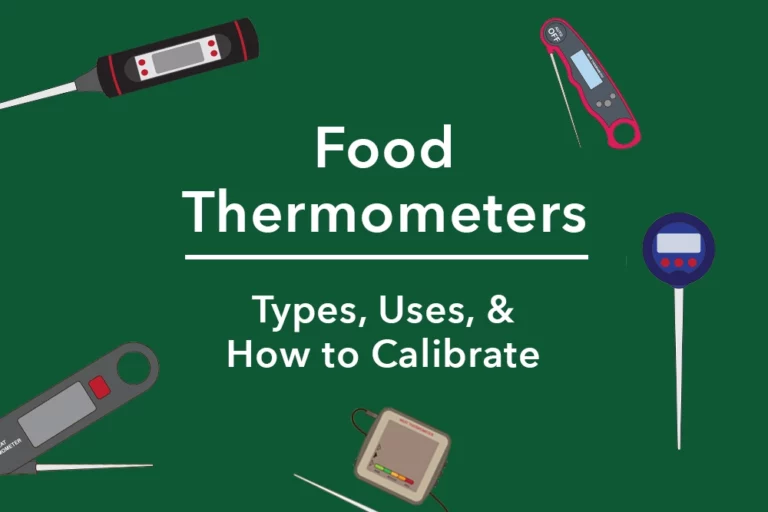
Know your thermometer types
Not all tools read heat the same way. Pick the best one for your task.
- Instant-read digital. Fast, accurate, and easy to read. Great for daily cooking. Reads in 3 to 5 seconds.
- Thermocouple probe. Very fast and precise. Ideal for thin foods and pro use. Reads in 1 to 3 seconds.
- Dial (bimetal) instant-read. Affordable but slower. Needs deeper insertion. Reads in 15 to 20 seconds.
- Oven-safe leave-in probe. Stays in roasts while cooking. Good for low and slow cooks and alarms.
- Smart Bluetooth or Wi‑Fi probes. Track temps and set alerts on your phone.
- Infrared (IR) thermometer. Reads surface only. Not for internal doneness.
When you learn how to use food thermometer correctly, match the tool to the job. Thin foods need fast sensors. Big roasts benefit from leave-in probes.
Calibrate for accuracy
A thermometer is only useful if it is accurate. Check it often, and after drops or big temperature swings.
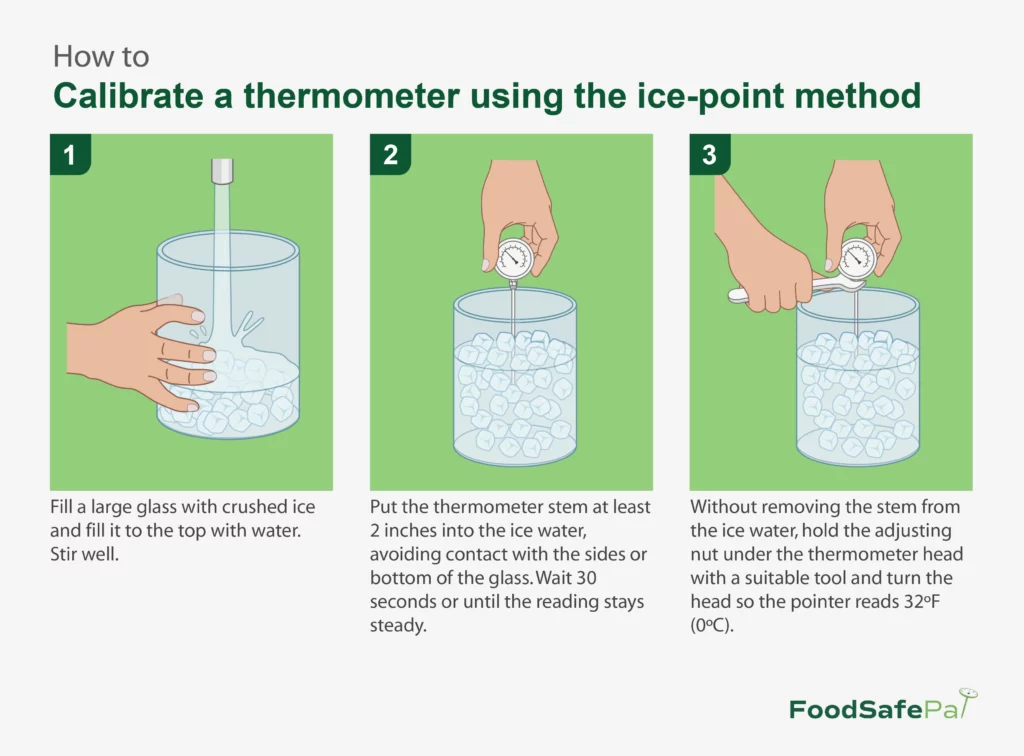
- Ice water test. Fill a glass with crushed ice and water. Stir, wait 2 minutes. Insert the probe tip into the icy water without touching the glass. It should read 32°F. Adjust if your model allows.
- Boiling water test. Bring water to a rolling boil. Insert the tip without touching the pot. At sea level, it should read 212°F. Subtract about 1°F for every 500 feet above sea level.
- How to adjust. Many dial models have a small nut under the head. Turn gently to calibrate. For fixed digital units, note the error and compensate when reading, or replace if off by more than ±2°F.
Do this monthly at home. In my kitchen tests, small drifts created big errors in steaks and sugar syrups. Knowing how to use food thermometer correctly includes checking it first.

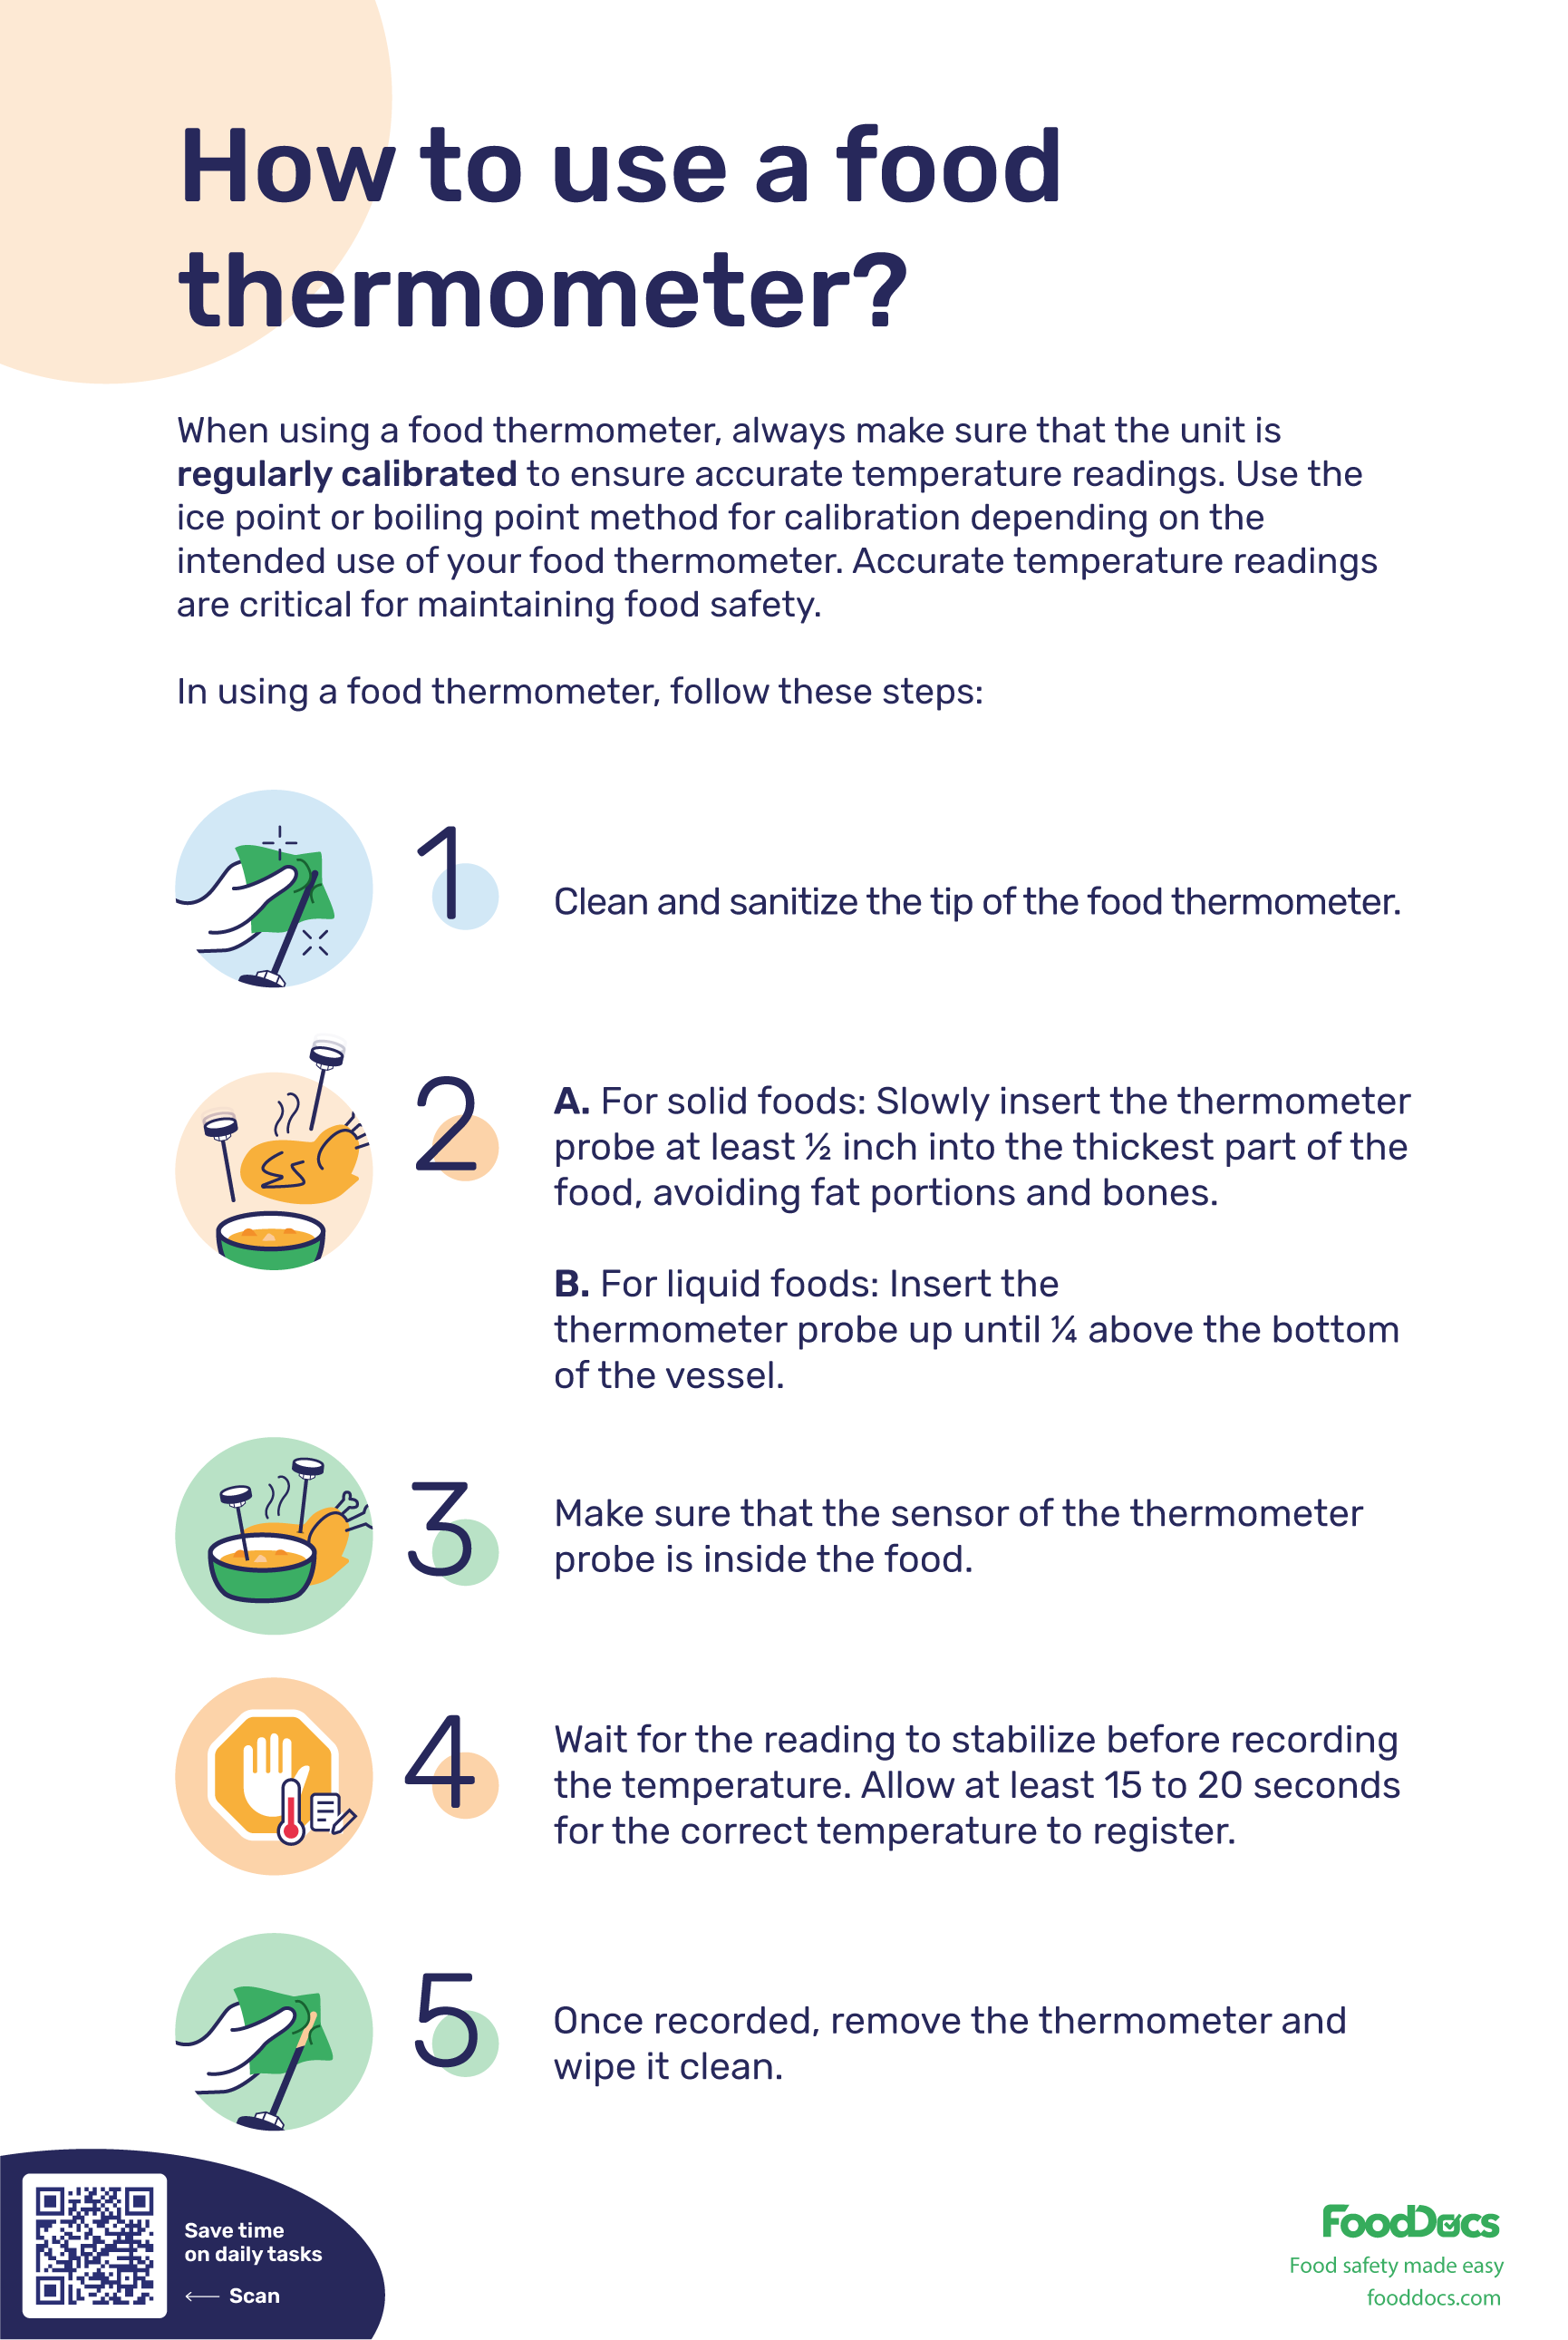
Step-by-step: how to use food thermometer correctly
Follow these easy steps every time you cook.
- Choose the right spot. Find the thickest part of the food. Avoid bone, fat, and the pan.
- Insert the tip to the center. Aim for the coldest point. For thin foods, insert from the side.
- Wait for the reading to steady. Digital needs a few seconds. Dial needs longer.
- Check more than one spot. Especially for large cuts, casseroles, and reheats.
- Compare to safe temperatures. Use the guide below to confirm doneness.
- Rest when needed. Some meats need a rest to finish and reabsorb juices.
- Clean the probe. Wipe with hot, soapy water or an alcohol wipe between tests.
Real-life example: Early in my career, I checked a turkey near the breast edge and got 165°F. The thigh joint, the cold spot, was 150°F. That bird needed more time. Learning how to use food thermometer correctly saved the holiday and taught me to check joints and the deepest part first.

Safe internal temperatures and rest times
Use these core targets from food safety guidelines. Always measure in the thickest part.
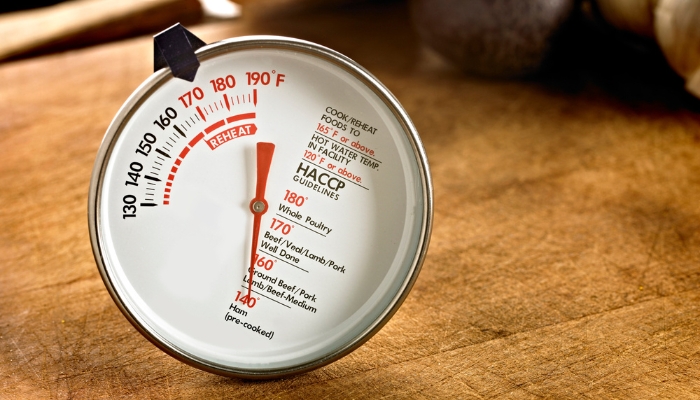
- Poultry whole or ground. 165°F. No rest needed, but 5 to 10 minutes helps juiciness.
- Ground beef, pork, lamb, or mixtures. 160°F. Color is not reliable.
- Whole cuts of beef, pork, lamb, veal. 145°F and rest 3 minutes. Temp can rise a few degrees as it rests.
- Fish and shellfish. 145°F or cook until flesh is opaque and flakes.
- Eggs and egg dishes. 160°F for quiches, casseroles, and custards.
- Leftovers and casseroles. 165°F throughout. Stir and re-check in multiple spots.
- Ham. Fresh 145°F with 3-minute rest. Precooked reheated to 140°F if intact, 165°F if leftovers.
- Plant-based meats. Follow package, but many recommend 165°F for safety.
Once you know how to use food thermometer correctly, these numbers become second nature. Keep a small card on the fridge for quick checks.
Placement tips for different foods
Specific foods need specific probe spots to get a true reading.
- Chicken breast. Insert into the center from the side. Avoid the thin tail end.
- Whole chicken or turkey. Probe the thickest breast area and the inner thigh near the body, not touching bone.
- Steak or chop. Go in from the side to the center. For reverse sear, check early and often.
- Burgers. Insert sideways into the center. Check at least two patties.
- Meatloaf. Probe dead center. If very thick, check in two places.
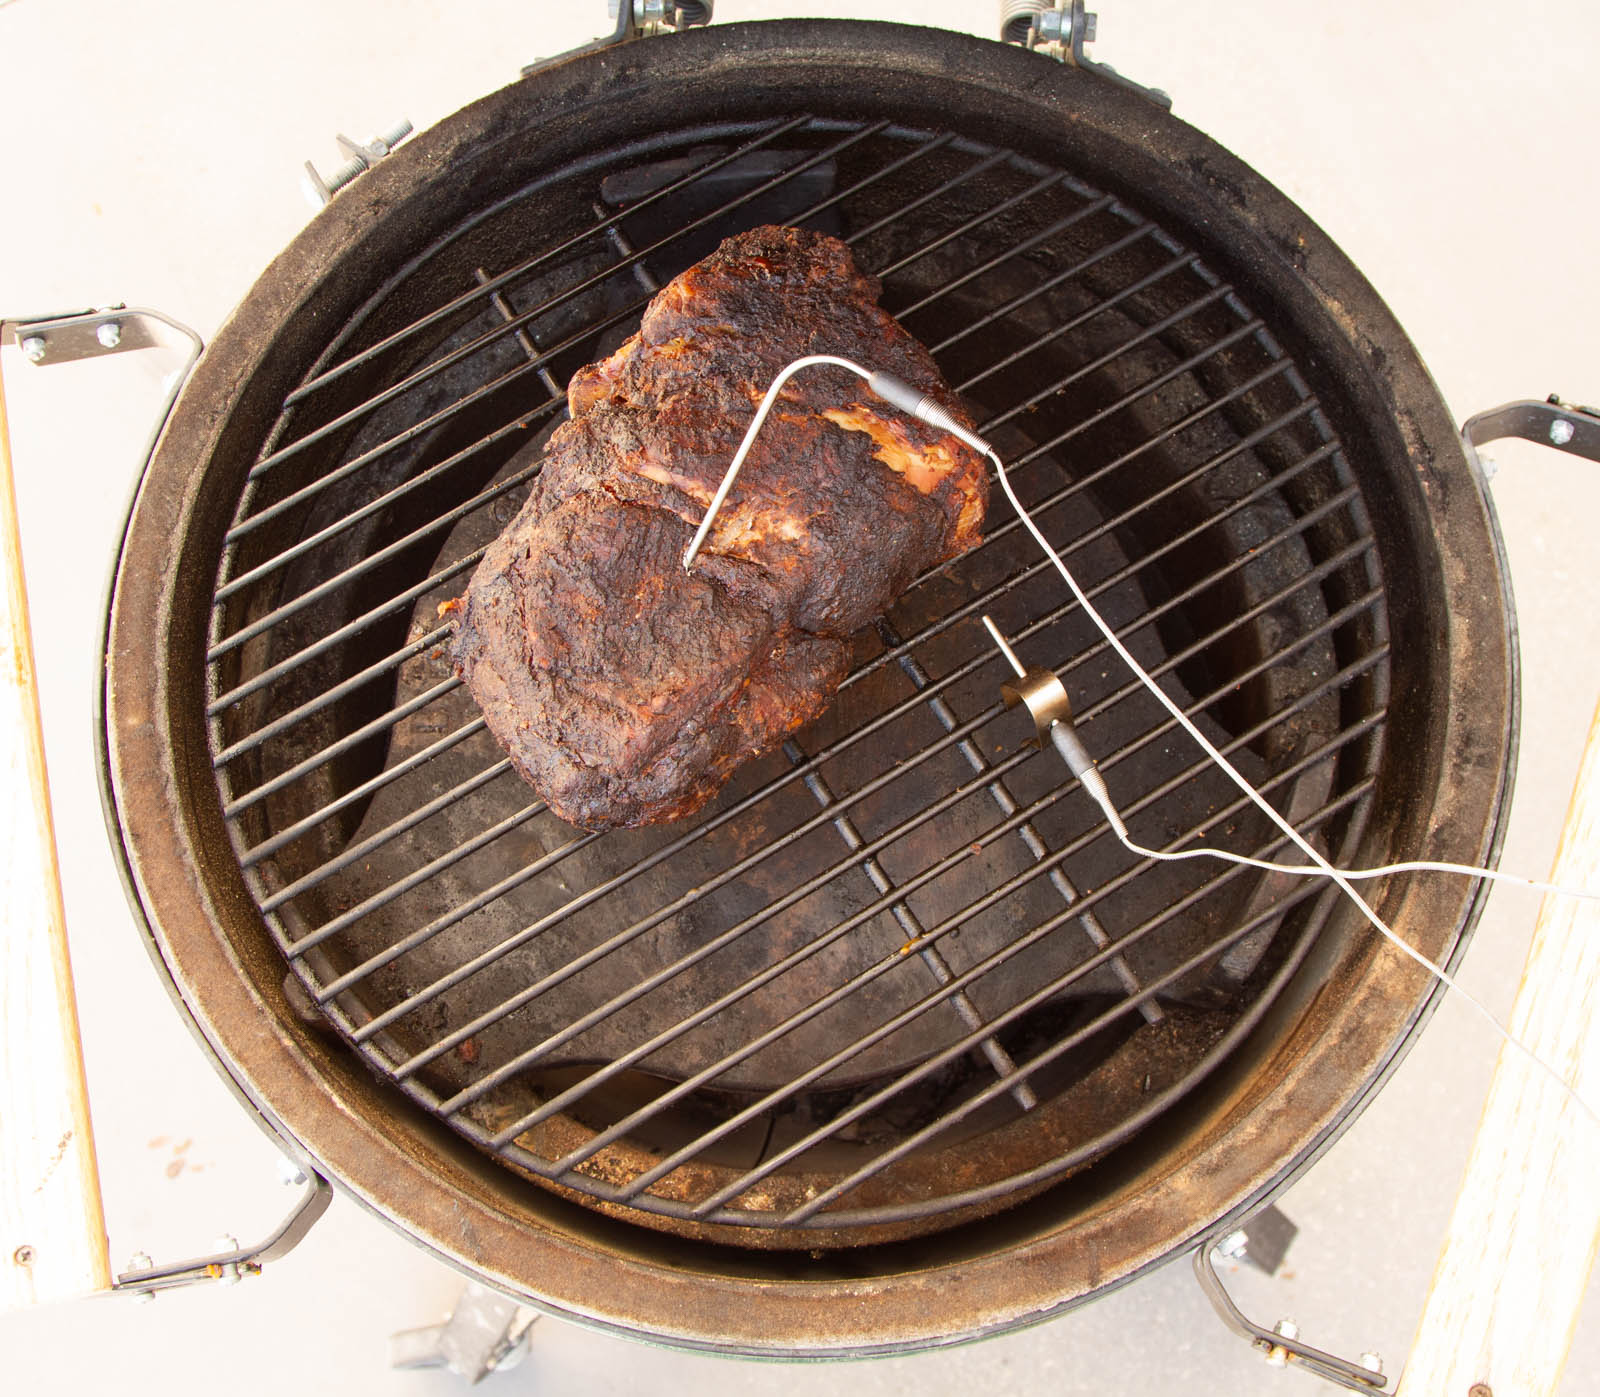
- Ribs and brisket. Use a leave-in probe for pit temp and a handheld for spots. Tenderness also matters.
- Fish fillet. Angle into the thickest part. For whole fish, check behind the head near the spine.
- Bread and baked goods. Insert in the center. Many quick breads finish around 200 to 205°F.
- Soups and sauces. Stir, then measure. Stir again and recheck.
These habits are the core of how to use food thermometer correctly. The right spot beats any timer.
Cleaning, care, and storage
A clean probe prevents cross-contamination and keeps flavors pure.
- Before cooking. Wash the probe with hot, soapy water. Rinse and dry.
- Between checks. Wipe with an alcohol pad or hot, soapy towel.
- After cooking. Wash, rinse, and dry at once. Do not soak the entire unit.
- Storage. Keep dry and protected. Avoid tossing into drawers where tips can bend.
- Battery and damage. Replace low batteries early. If the lens fogs or the probe is loose, service or replace.
- Recalibrate. Check monthly, and after drops or extreme heat.
Part of learning how to use food thermometer correctly is caring for the tool. A clean, accurate probe is your kitchen seatbelt.

Common mistakes to avoid
I have made them all. You can skip the pain.
- Only checking one spot. Cold spots hide in joints and centers. Check more than once.
- Touching bone or the pan. This gives false highs. Pull back the tip until the temp drops, then read.
- Reading too soon. Wait for the number to settle.
- Using IR for doneness. IR reads surfaces only. Not safe for internal temps.
- Not resting meats. Juices need time to settle. Rest as noted above.
- Guessing on thin foods. Insert from the side to hit the center.
Fixing these is the heart of how to use food thermometer correctly. Small tweaks, big gains.
Pro tips from the test kitchen
These tricks come from years behind the stove and the grill.
- Map the cold spot. In a roast, slide the tip in and out slowly. Watch for the lowest number.
- Use two thermometers. A leave-in probe for the journey, and a fast instant-read for final checks.
- Angle the probe. A 15 to 30 degree angle helps you land in the center of thin foods.
- Set alarm points. For long cooks, set an alarm a few degrees early to avoid overshooting.
- Plan for carryover. Steaks often rise 3 to 5°F off heat. Roasts can rise 5 to 10°F.
- Sous vide finishing. Even with sous vide, confirm temp after sear if food sat in the danger zone.
These moves make how to use food thermometer correctly feel smooth and easy. They turn good cooks into great ones.
Troubleshooting weird readings
If numbers look off, try these quick checks.
- Compare tools. Test two thermometers in ice water. If they agree, the reading is likely real.
- Check insertion depth. Many sensors need the tip fully in the center.
- Watch for steam and moisture. Condensation can fog displays or seep into seams.
- Replace batteries. Weak power causes slow or jumpy readings.
- Retire broken probes. Bent tips or frayed wires cause errors.
When in doubt, run the ice test. It is the fastest way to keep how to use food thermometer correctly and reliable.
Frequently Asked Questions of how to use food thermometer correctly
How do I know where to place the probe?
Aim for the thickest part and the center. Avoid bone, fat, and the pan to prevent false readings.
How often should I calibrate my thermometer?
Check monthly, and after drops or extreme heat. If it is off by more than ±2°F, adjust or replace it.
Can I leave my thermometer in the oven?
Only if it is an oven-safe leave-in probe. Instant-read models are not meant to stay in the oven.
What if my meat meets temp but looks pink?
Color can mislead. If it hits the safe internal temperature, it is safe to eat, even if still pink.
Do I need different temps for air fryer or grill?
Heat source does not change safety temps. Always target the same internal temperatures and rest times.
Are infrared thermometers good for checking doneness?
No. IR reads surface only. Use a probe thermometer for internal doneness.
How long should I wait for a reading?
Wait until the number stops moving. Digital reads in a few seconds; dial types can take 15 to 20 seconds.
Conclusion
Cooking by temperature is the simplest way to nail safety and flavor. Now that you know how to use food thermometer correctly, you can skip guesswork and hit perfect results every time. Start today: calibrate your thermometer, print the safe temps, and check the center of your next meal. Want more tips? Subscribe, share your wins in the comments, and ask what you want tested next.